The MPLAB X is an IDE for developed by Microchip Inc. for their PIC microcontrollers. It has a lot of added features when compared to the older MPLAB IDE v8.xx. TheA MPLAB X is not a new version of the current MPLAB IDE v8. Instead it is a brand new IDE based on Oracle’s open-source NetBeans platform.
Old habits die hard they say, that’s exactly what happens when you are migrating from one IDE to another for the same controller, you tend to have a hostile feeling. I still see some people have not switched over in spite of all the advertisement form Microchip. Here are 8 (good) reasons why you should change to MPLAB X IDE.
In each of the sections I have added images which you can click to enlarge.
Docked workstation
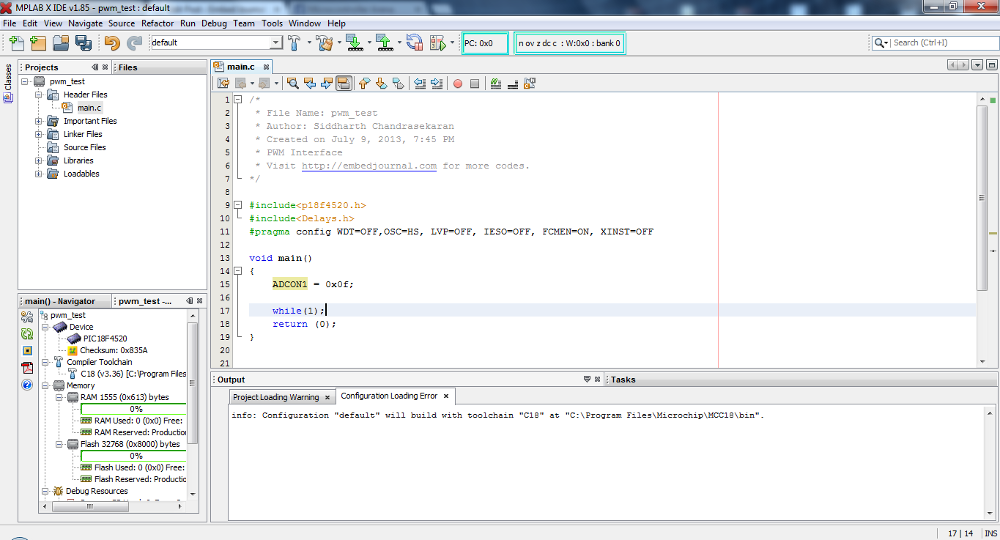
MPLAB X IDE has made a giant leap in terms of the docked workstation. This is something that has to be marked as ‘the’ most important feature of the new IDE from Microchip. The older IDEs had all the windows dangling around and was really not capable of handling projects with multiple files effectively. Here all the files of a project can be opened and tabbed.
Any window can be re sized to suit your need. You can also minimize all the windows to have only the code editor in the entire screen. The minimized windows appear as a pop-up and vanish after you are done with it.
Ease of use
With this IDE you don’t have to remember the path of almost any tool. You can easily customize it to show in your front panel. The MPLAB X IDE already has all the frequently used tools in the front panel of the IDE. If you need more you could do so with a right click on the tools bar and choosing the customize option.
Auto completion
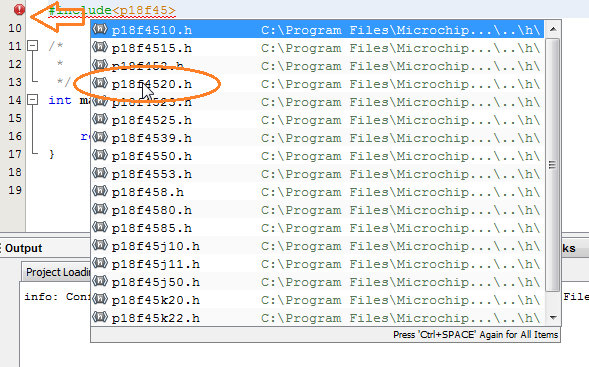
The IDE has the auto complete feature that can be used to complete known header files and port pins without having to type it fully. As you start typing there is a box that drops down to have all the possible combination. You can ignore in and keep typing or choose one form the list. Since it shows all the list of possibilities, you will know if what you are doing is legal or not, instantaneously.
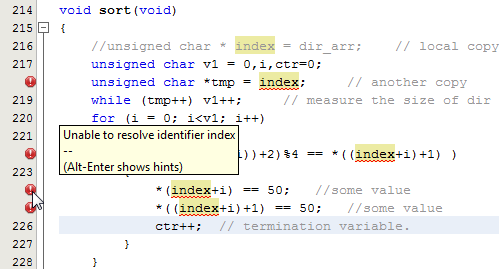
If the header file or a port pin that you are trying to define does not exist, you will see a read mark on that line number indicating an error. This can be a little distinctive at first but you will get used to it soon.
Mark occurrences
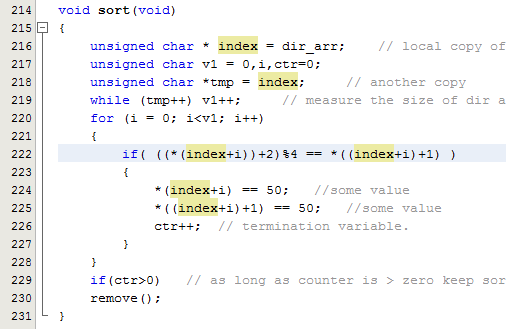
This is another new feature of the MPLAB X IDE. If you place your cursor on any variable or a macro, it highlights all the other instances of the same variable. It also shows an indication on the scroll bar on all the other instances in case of a long file.
This feature is really helpful in debugging or porting code. In the picture, I have placed my cursor on one the variable index and you can see all its instances are shown up in the highlight.
Live syntax checker
There is a syntax checker that is running in the background that interprets your code line by line and checks the correctness of the syntax and the logic. It is capable of detecting some very common errors such as, undefined variable, unused variable and syntax error.
This also reduces the total number of errors you might have at the end of the compilation. Simply put, you won’t have to correct a dozen typos and semi colons at compile time. In this example I have commented out the declaration of the variable index and you can how it reacts at all instances of index.
Dashboard Window
The dashboard window is another inclusion in the MPLAB IDE. It has various useful information such as the RAM and EEPROM usage. it also gives a gist of the project properties. If you are working with multiple families of the PIC Microcontroller, this window will help you quickly understand which tool chain and programmer you have configured without having to go to the project properties.
It has a launcher for the project properties window, and an icon to refresh the debugger/programmer tool status. Another great feature is the icon for the data sheet launch. You can see a small PDF image in the left of the image. If you have a datasheet directory, you can give the path to this icon for launching the datasheet PDF file.
One click Comment and Un-Comment of code
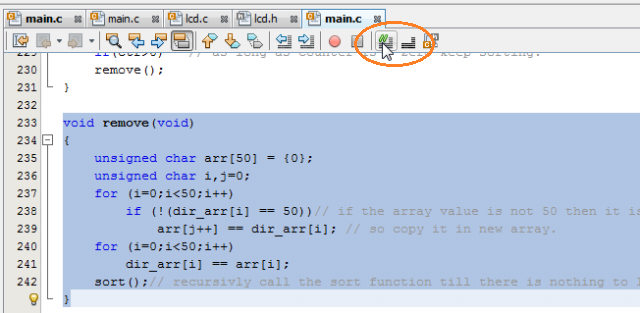
If you are testing a project, the most conventional method is to disable all the modules (sets of code) and test individual module and then recombine them. For doing this, the comment and un-comment button on the code editor can be used. With one click you are able to comment out large parts of code and revert back by selecting the commented out portion and clicking the un-comment button. There are short-cut keys available to do this, which can make life, a lot simpler.
Variable, headers and function Navigation
This is another feature exclusively available in the MPLAB X IDE alone. When you hover your mouse over a file included or a macro defined or a variable used, with the CTRL key pressed, you get a hyper link that can be clicked to navigate through the project to the place of declaration or to the file itself in case of the header files.
In this example I’m having the mouse over the #include<Delays.h> line. You can see that there is a pop up window that shows the location of the file in the hard disk. This line is now linked to the location of the file Delays.h and you can open it by clicking on it.
To conclude, some times in life, you will have to leave things and move on. Now is the time to move on to the more advanced IDE for the PIC microcontroller from it’s manufacturers. Not all the modules available in the v8 have been ported into the MPLAB X IDE but most of it has been done and more are being done.
From what I read, microchip will stop support for v8 in the foreseeable future and you will anyways be forced to use the MPLAB X IDE. So it better be an action of choice than an action due to lack of options. In my upcoming post I will deal with the getting started with the MPLAB X IDE.
