At some point in time we all have had to develop some sort of UI for our embedded devices. The thing about UI design is, it can take one hell of a time before we can get it right (and it’s a thankless job! I have my reasons).
I for one, hated (note past tense) glcd work. I always found reasons to postpone or push it off to one my co workers. Now don’t get me wrong here, I’m referring only to embedded UI design. I had two main reasons for this dislike,
- The roundtrip time involved in flashing the device, and reflashing with the updated layout. This time may be significantly long if your code base is large.
- How ever good a programmer you are (IMHO), GLCD layer almost always looks bad after speed optimizations.
Now I know I can’t do much about the second point. But with some thinking, I figured point one is actually addressable with only a couple of my Sundays!
So I spent some time to create an emulator that can take the glcd back plane and display it on a window on your desktop. So the round trip time is totally eliminated from the equation. I can’t say I really like it now, but I certainly don’t dislike it as much as I used too.
How it works?
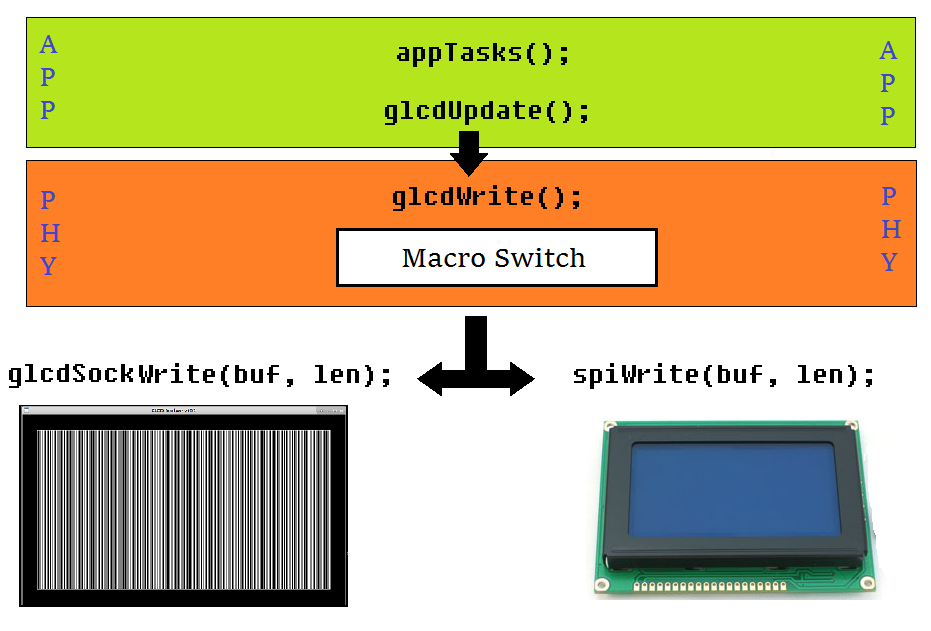
A typical software architecture for GLCD will be as follows (at least that’s how I would have it). The app layer gets new data that has to be pushed into the GLCD. Then it calls refresh routine to make changes to a backplane. The physical layer then processes this information into a bitmap and then calls a glcdWrite routine to flush the new data into the display RAM.
We will now introduce a small change in code flow that will do the magic. Just before the call to glcdWrite, a code macro is used to send the same data to the emulator instead of the actual GLCD.
The sequence is illustrated in the following image.
Data Encoding
Most commercially available GLCDs are 1 bit per pixel packed into bytes in two different ways.
- Row Major - MSB of first byte is pixel (0,0) and LSB is pixel (7,0). Second byte represents pixels (8,0) to (15,0) and so on.
- Column Major - MSB of first byte is pixel (0,0) and LSB is pixel (0,7). Second byte represents pixels (1,0) to (1,7) and so on.
Therefore, the glcd buffer length would be, buf_len = glcd_width/8 * glcd_height;This buffer is what your embedded device sends out to the GLCD through the SPI/I2C bus and the glem server expects same buffer to render the image.
Installation:
If you have any experience installing software in Linux, installing GLEM should be little/no trouble at all.
You can find the git upstream at https://github.com/EmbedJournal/glem.Clone this repository into your machine and follow the instructions in the README.md file to install it.
Once you have made the project, you will have to start the GLEM server with your GLCD’s width and height as arguments. For example if you have a 128x64 1bit GLCD, you should run,
$ ./glem serve 128 64
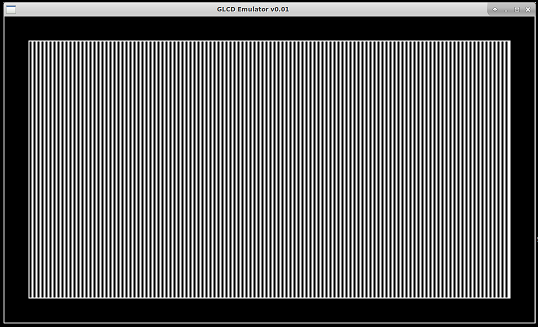
Now you should see a new window looking something like this (may not be identical as I may have made changes at some point that deviates from this article).
The vertical lines have appeared because I wrote 0x55 to all display RAM. You can also run the following to test if GLEM server is working,
$ ./glem test 128 64
To understand how to use it in your project, have a look at example.c in the src directory. It includes glcd.c which behaves as the physical layer for GLEM. You macro switch should redirect your SPI/I2C calls to this file.
Hope this was helpful. Leave your feedbacks in the comment sections.


